What this feature does, when to use each option, and why getting it right matters to everyone who touches stock.
WHIMS keeps a running count of how many units of every part you hold, and exactly where each one sits — which warehouse, and which shelf or bin inside that warehouse. That count is what salespeople, buyers and pickers rely on all day.
Most of the time the count looks after itself: receiving a purchase order adds stock, and selling or shipping removes it. But real warehouses are not tidy. Boxes turn up without paperwork, items get damaged, a shelf gets counted and the number on the screen simply does not match the number on the shelf.
The Stock Add / Remove / Adjust feature is the set of tools that lets a person step in and correct the count by hand. There are three things you can do:
Every one of these actions is written into a permanent log called Stock History, together with your name, the date and time, and the reason you typed. Nothing you do here is anonymous, and nothing is silently overwritten.
A stock figure that nobody trusts is worse than no figure at all. Staff stop looking at the screen, start walking to the shelf, and the system quietly becomes decoration. These tools exist so that the moment somebody notices a difference, they can fix it properly — in seconds, with a reason attached — instead of leaving it for "someone else, later".
Use it when: goods arrive without a purchase order; a customer return is put back on the shelf; you find units that were never entered; you are setting up a brand-new shelf for the first time.
What it does: takes the number that is there now and adds your figure to it. If the shelf held 2 and you add 25, it becomes 27.
Where: Stock Levels → Stock Actions → Stock Take, or the Adjust button on a product, choosing Add to Stock.
Use it when: items are damaged, scrapped, lost or stolen; samples are given away; parts are consumed internally; a shelf is cleared out.
What it does: takes the number that is there now and subtracts your figure from it. If the shelf held 14 and you remove 12, it becomes 2.
Where: the Adjust button on a product, choosing Deduct from Stock. To clear an entire shelf at once, use Locations → Empty Location.
Use it when: you have physically counted a shelf during a stock take or cycle count and the system disagrees with what you found.
What it does: replaces the number with the figure you type. You do not work out the difference — you type what is actually there. If the system says 2 and you counted 18, you type 18.
Where: Stock Levels → Stock Actions → Stock Change.
Stock Take adds to the number that is already there. Stock Change replaces it. If a shelf holds 2 units and you meant to end up with 18:
Typing 18 into Stock Take would leave you with 20. When in doubt, use Stock Change and type the number you counted.
This guide is titled "Add / Remove / Adjust" because that is what people say. The buttons on the screen use slightly different words. Here is the translation — keep this table handy for your first few weeks.
| You want to… | Button in WHIMS | Where you find it | Best for |
|---|---|---|---|
| Add stock | Stock Take | Stock Levels → Stock Actions | One product |
| Add stock | Bulk Stock Take | Stock Levels → Stock Actions | Many products, from a spreadsheet |
| Add stock | Adjust → Add to Stock | Products → open a product → Stock Locations & Quantities | One shelf you are looking at |
| Remove stock | Adjust → Deduct from Stock | Products → open a product → Stock Locations & Quantities | One shelf |
| Remove stock | Empty Location | Locations → open a location | Clearing a whole shelf to zero |
| Adjust stock | Stock Change | Stock Levels → Stock Actions | One product |
| Adjust stock | Bulk Stock Change | Stock Levels → Stock Actions | Many products, from a spreadsheet |
"Stock Take" in WHIMS means add these units to the shelf. It does not mean "wipe the shelf and start again". If you are doing a full physical count and want to set the shelf to exactly what you counted, use Stock Change.
Sales staff quote from the screen. An overstated figure leads to an order you cannot fill; an understated figure loses a sale you could have made.
Purchasing decisions are made from these numbers. Bad numbers mean money tied up in parts you already had, or a shortage nobody saw coming.
WHIMS stores the shelf, not just the quantity. Correct locations turn a five-minute hunt into a ten-second walk.
Quantity multiplied by average price feeds the value of your inventory. Wrong counts distort that figure straight away.
Every correction is logged with a reason. Patterns — repeated shortages on one shelf, one supplier, one shift — become obvious instead of invisible.
When the book figure is usually right, a stock take is a quick confirmation rather than a week of investigation.
Numbered steps are things you do, in order. Bullet points are lists of possibilities. Names of things you click look like this: Stock Actions. Menu paths look like this: Inventory → Stock Levels. Screenshots appear immediately after the step they illustrate, with numbered markers matching the steps.
Four kinds of coloured box appear throughout:
Extra background — useful to know, but you can carry on without it.
A faster or safer way to do the same job.
Something that commonly goes wrong. Read before you click.
A rule you must follow, or something that cannot be undone afterwards.
What you need in place — and what you need to know — before you change a single number.
To use any of these tools you need:
WHIMS records three staff roles: Administrator, Warehouse Manager and Operations. Your administrator sets yours when your account is created.
In the current version of WHIMS the stock screens do not restrict these buttons by role. Anyone who can sign in to the admin area can run Stock Take, Stock Change, Adjust and Empty Location. Control of who can change stock therefore rests entirely on who has an account.
Two consequences worth taking seriously: never share your login, and never leave your session open on an unattended screen. Every movement is stamped with the signed-in user's name — if someone else uses your session, the record will say you did it.
Before you open any form, collect the following. Trying to find it halfway through is how mistakes happen.
| What you need | Why | Example |
|---|---|---|
| Product ID | Identifies the exact part. WHIMS also lets you search by supplier part number or Partslink number. | 06-335-1903L |
| Warehouse | Which site the stock is at. | Go-Parts GA |
| Location (shelf or bin) | Stock is held per location, not per warehouse. The same part on two shelves is two separate records. | 4.2 F |
| The number of units | Either how many to add/remove, or the exact figure you counted. | 25 |
| A reason | Written into the permanent history. Make it useful to someone reading it in six months. | Received from supplier — delivery note DN-4471 |
| Unit price (optional) | Only when you are adding stock and know what this batch cost. | 48.50 |
Write the reason before you open the form. A good reason answers what happened and how you know — "Cycle count 27 Jul, counted by R. Patel, 18 on shelf" beats "adjustment" every single time.
These tools change quantities. They cannot invent the things being counted. Before you start:
The stock record itself does not need to exist. If a product has never been held on a
particular shelf, Stock Take and Stock Change will create the record for you. The dropdown tells you
which is which: (Current Qty: 2) means stock is already there, (No stock) means a
new record will be created.
A guided tour of the screens, so that nothing you see later is a surprise.
/admin.
After signing in you land on the Dashboard. The menu runs down the left-hand side and is divided into groups. Three of them matter for stock work:
| Menu group | Item | What it is for |
|---|---|---|
| Inventory | Products | The catalogue of parts. Open a product here to see its shelves and use the Adjust button. |
| Stock Levels | The main stock screen — quantities by product and location, and the Stock Actions menu. | |
| Reports | Stock History | The permanent log of every movement, across all products. |
| Settings | Warehouses | Your sites. |
| Locations | Shelves and bins. Also where Empty Location lives. |
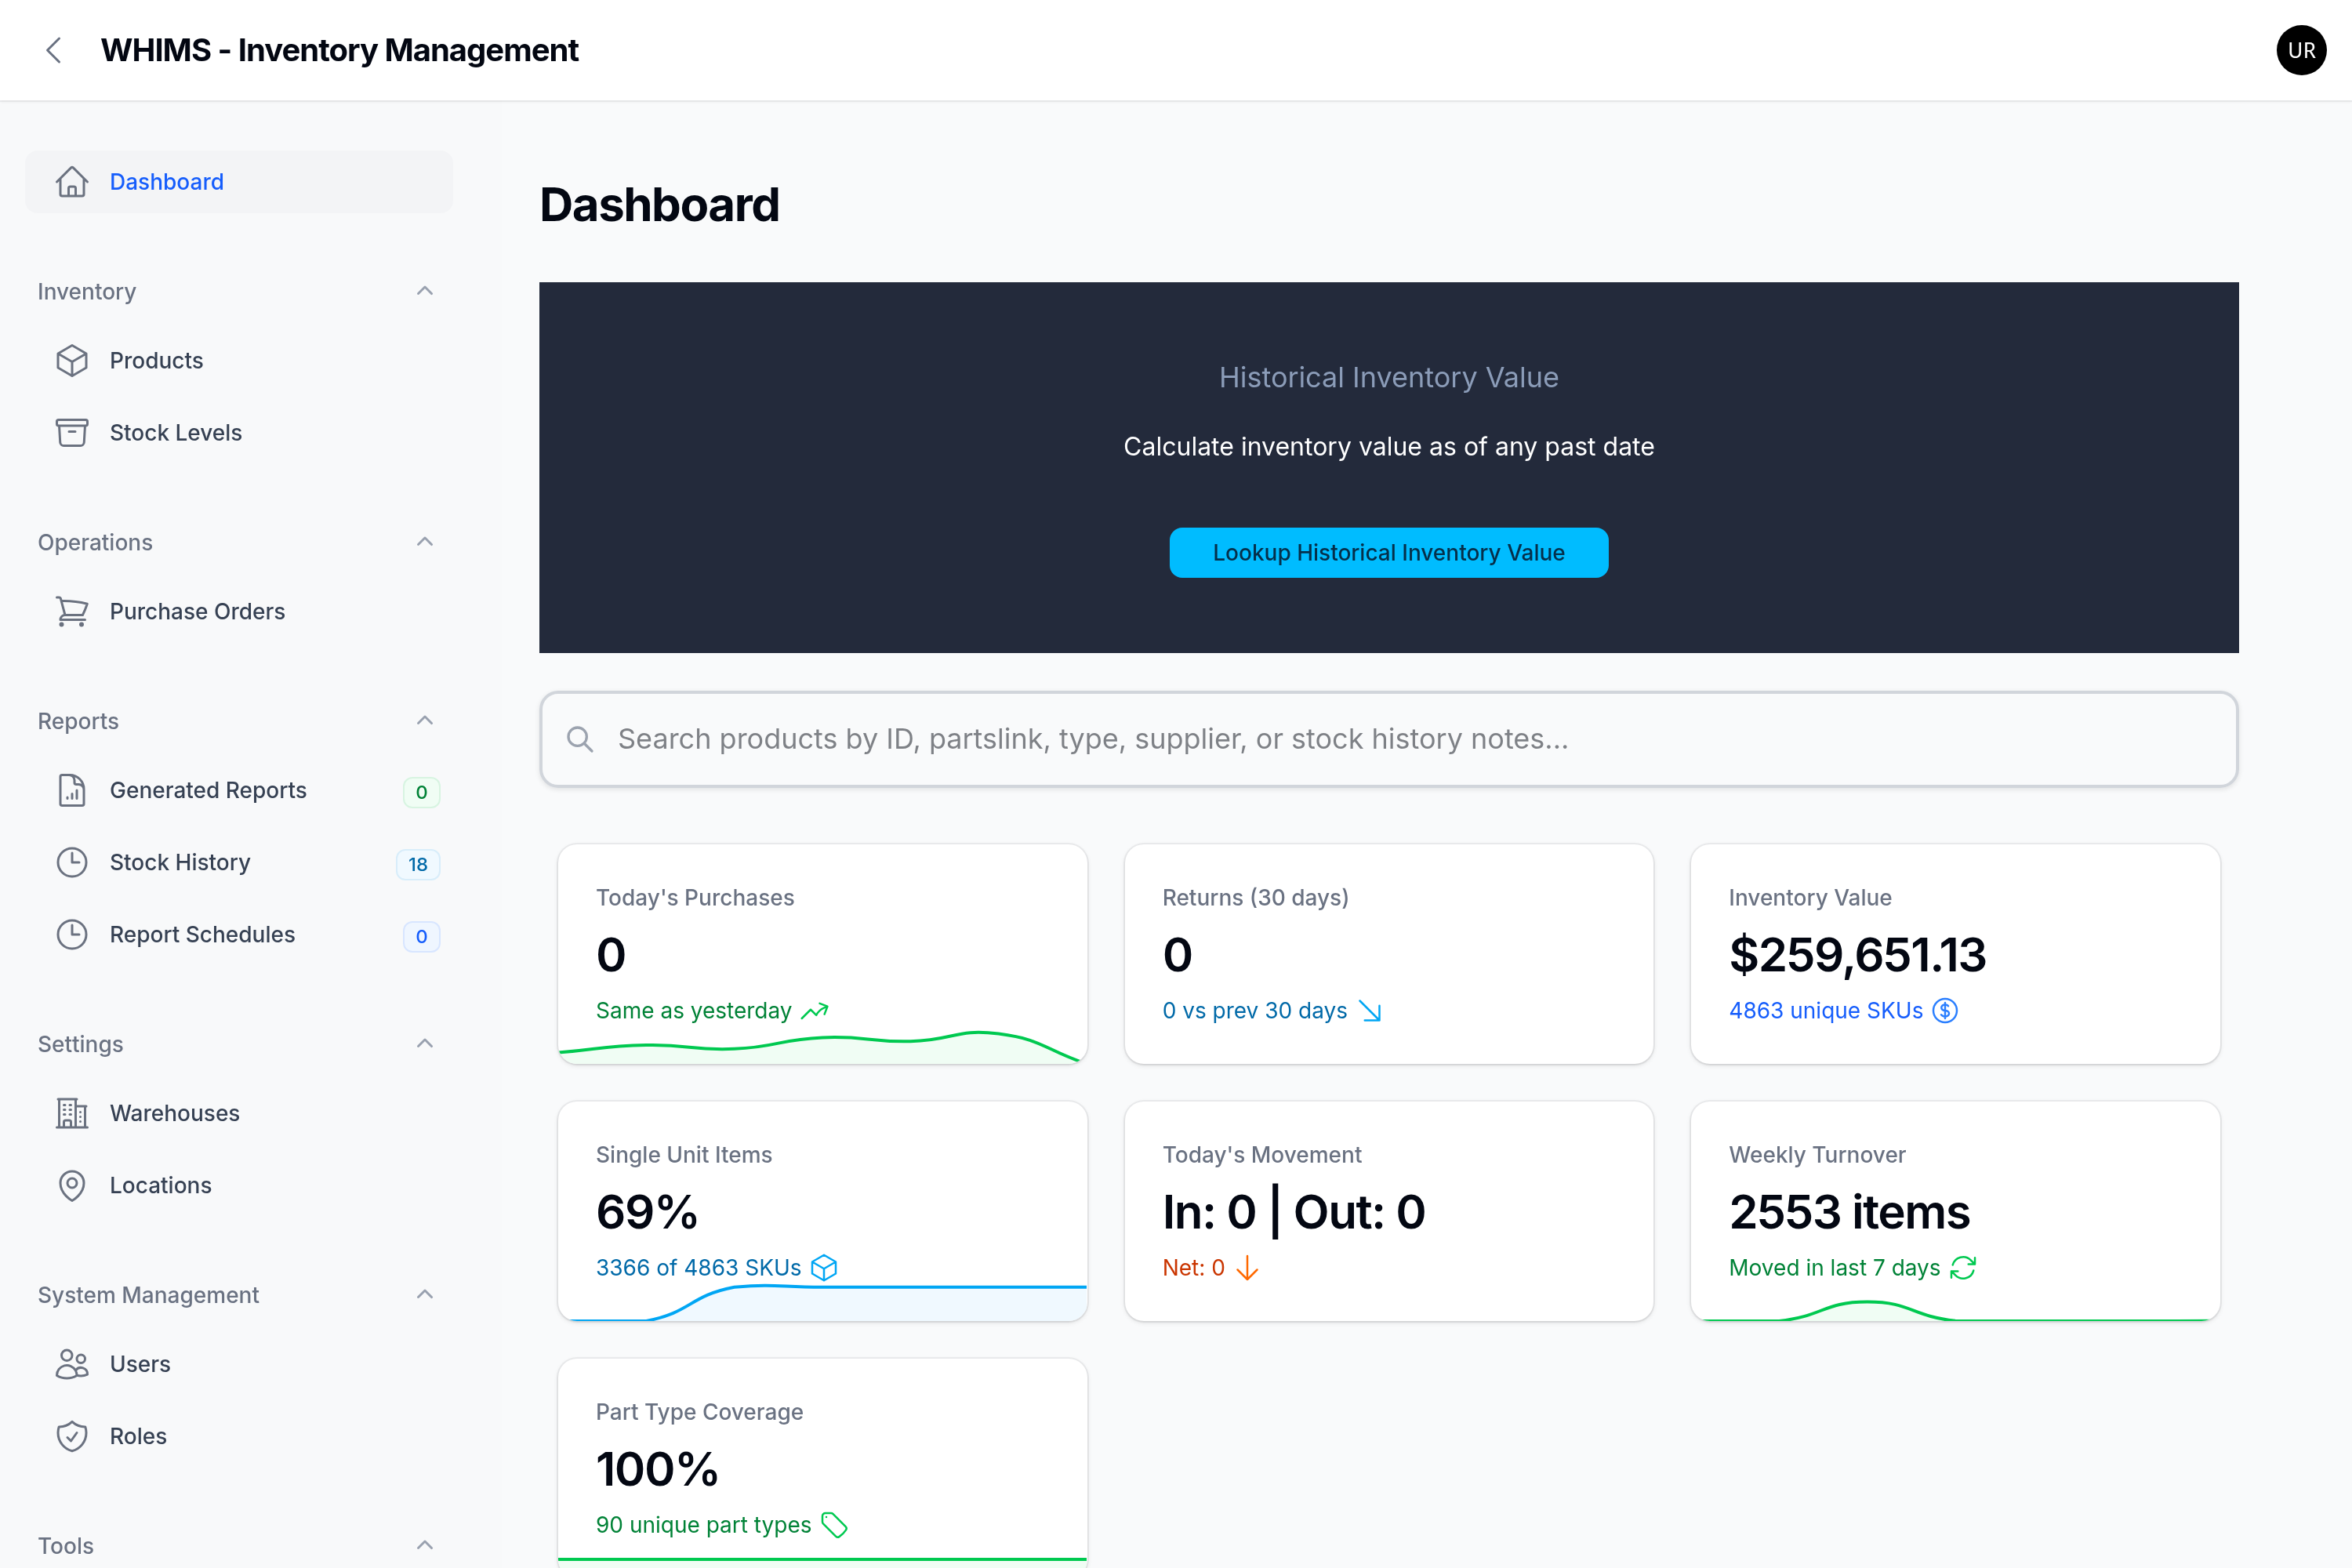
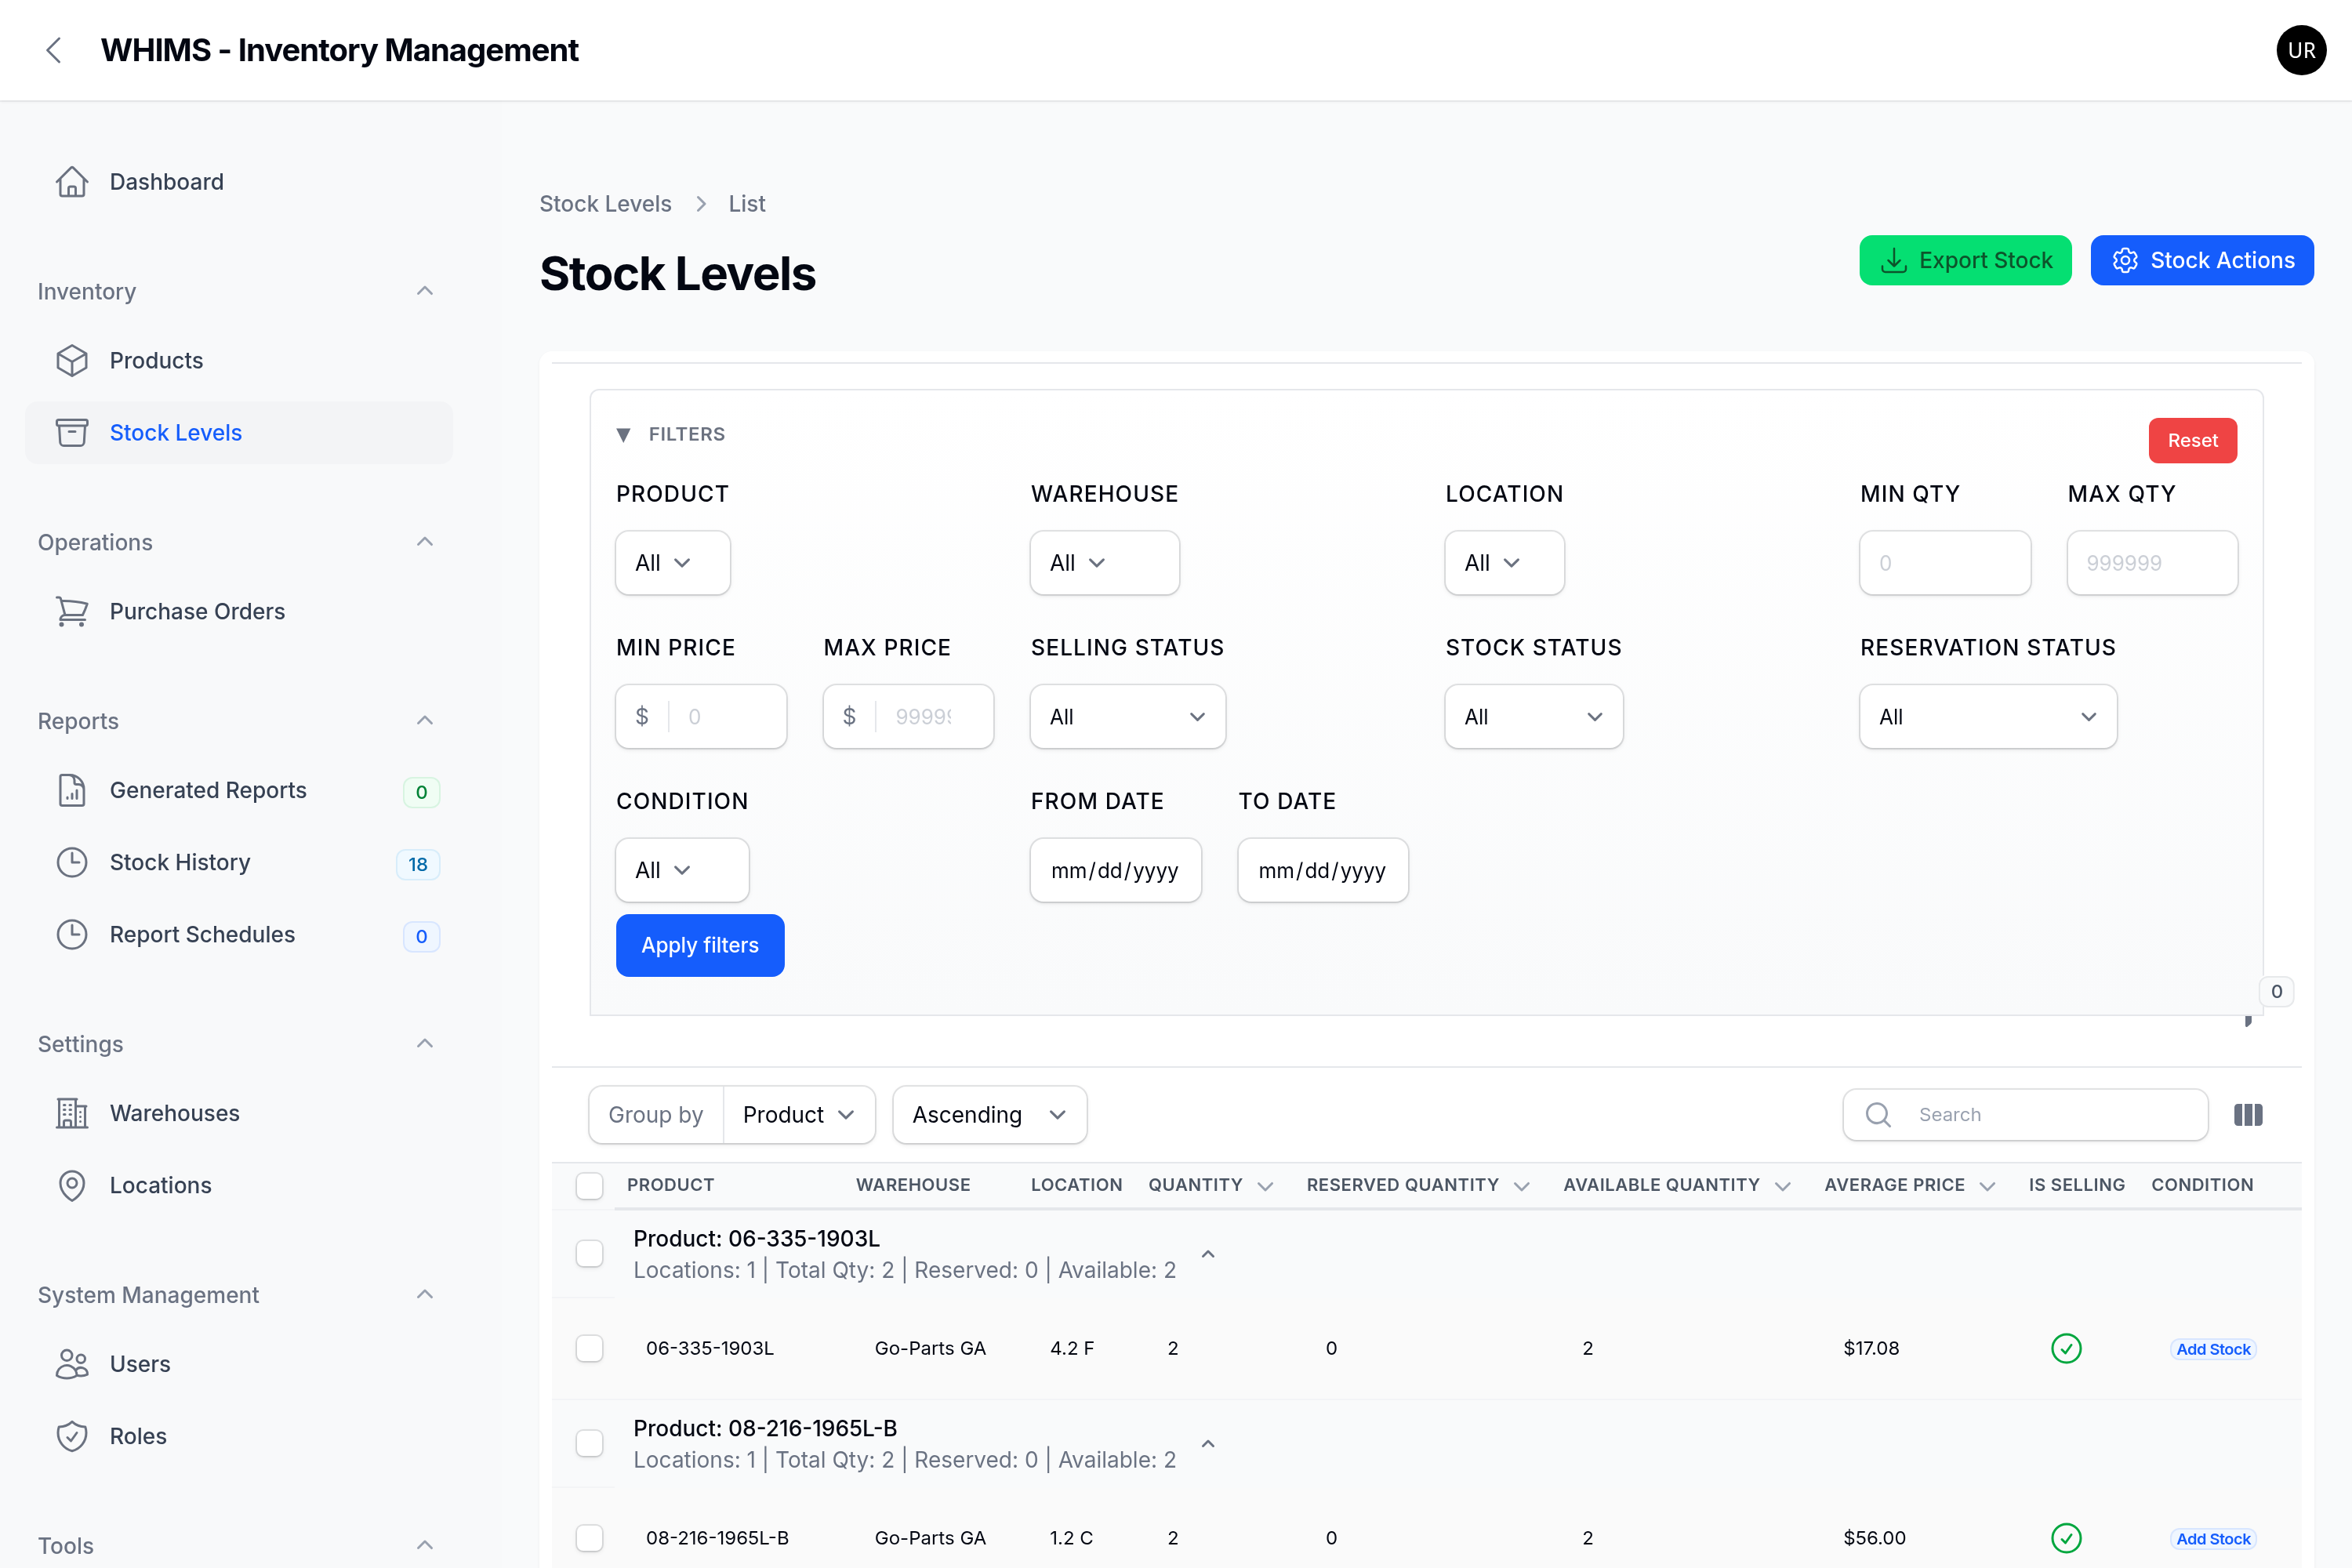
Go to Inventory → Stock Levels. This is the home of day-to-day stock work.
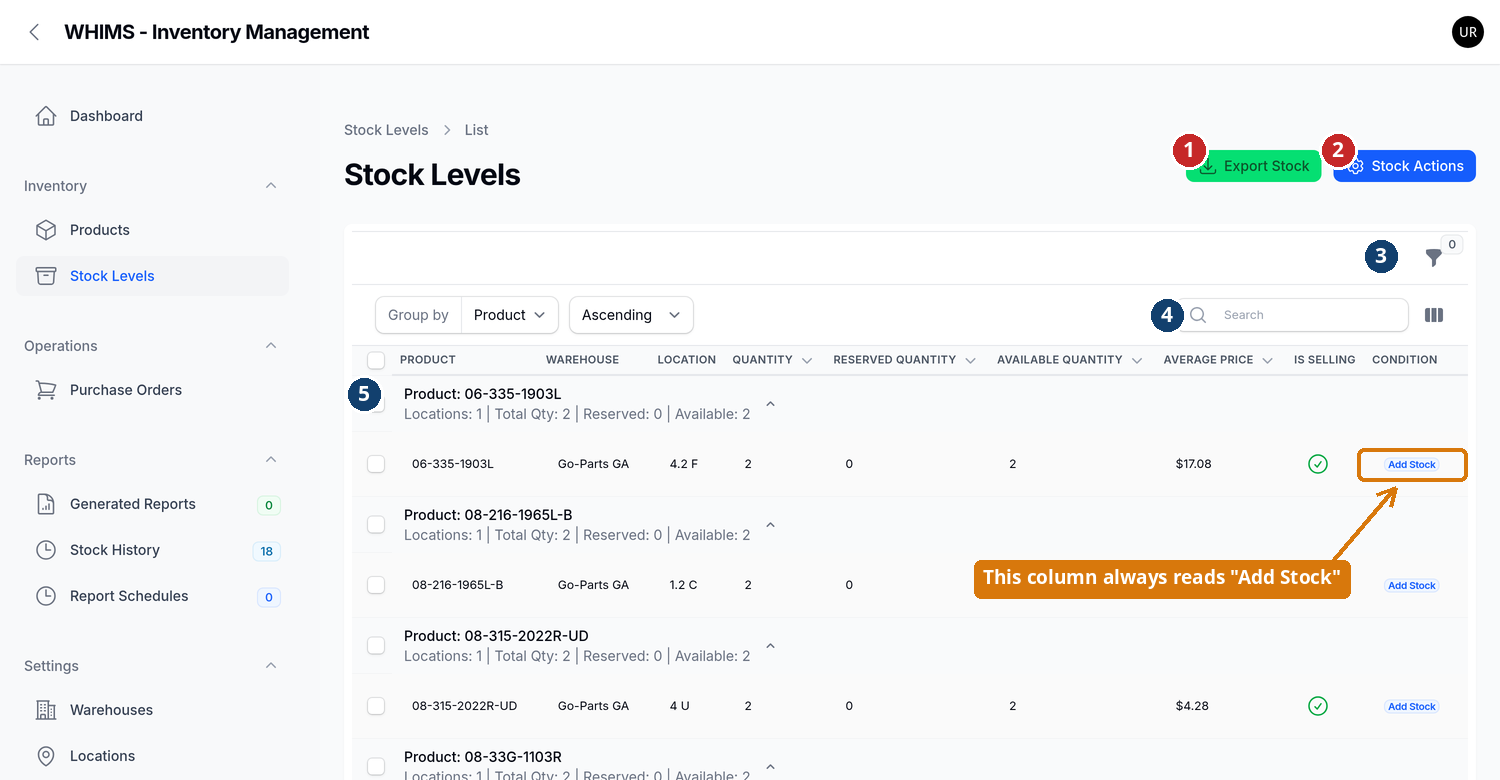
Rows are grouped by product. The grey heading row above each group gives you the summary at a glance — Locations, Total Qty, Reserved and Available — and the rows beneath it show each individual shelf. Click the small arrow at the right of a heading to fold that product away.
The last column is headed Condition, but every row displays the same blue text, "Add Stock". It is not a button and clicking it does nothing. The real condition of a stock record (New, Used, Refurbished, Damaged) is not shown correctly in this column at present. If you need to work by condition, use the Condition filter in the filter panel instead. This has been reported to the systems team.
Click the blue Stock Actions button at the top right. Four options drop down.
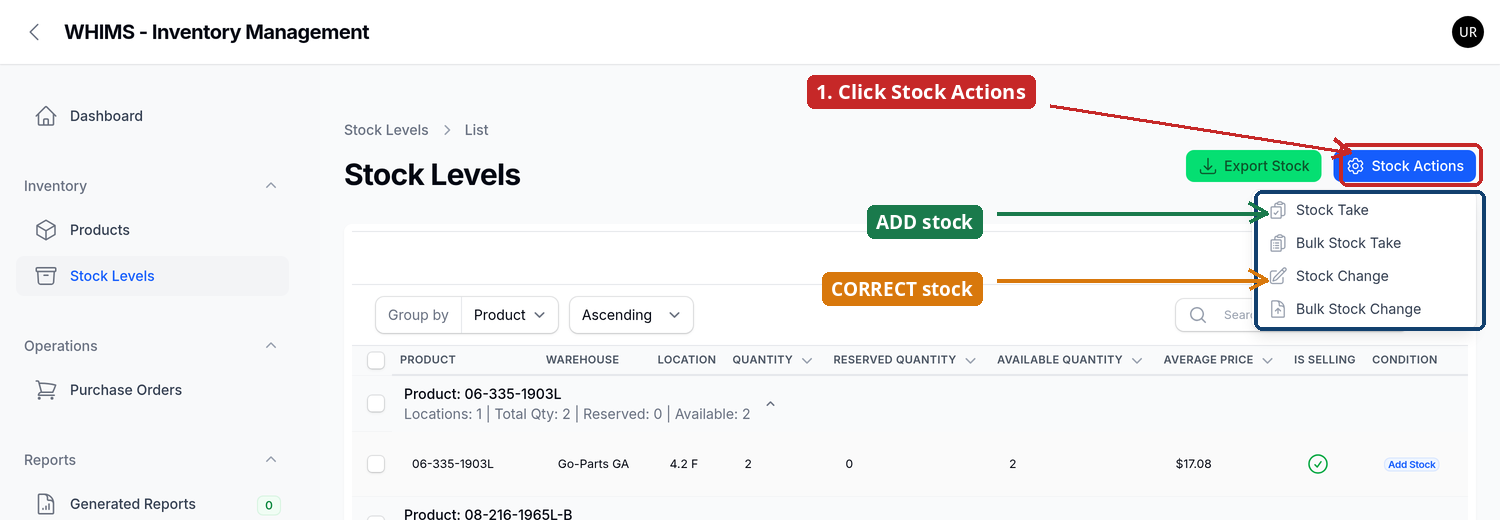
| Menu option | Effect | Use it for |
|---|---|---|
| Stock Take | Adds to what is there | One product, one shelf. |
| Bulk Stock Take | Adds to what is there | Many products at once, from a CSV spreadsheet. |
| Stock Change | Replaces the figure | One product, one shelf, where you know the true count. |
| Bulk Stock Change | Replaces the figure | Many products at once, from a CSV spreadsheet. |
Click the funnel icon above the table to open the filters. Set as many as you like, then click Apply filters. Reset clears them all.
| Button | Where | What happens when you click it |
|---|---|---|
| Export Stock | Stock Levels | Builds a spreadsheet of every stock record and confirms with a green message. Changes nothing. |
| Stock Actions | Stock Levels | Opens the menu of four stock tools. |
| Apply filters / Reset | Filter panel | Narrows or clears the list. Changes nothing. |
| Adjust | Product page, Stock Locations & Quantities | Opens the add-or-remove window for that one shelf. |
| Export Stock | Location page | Downloads a spreadsheet of everything on that shelf. |
| Empty Location | Location page | Starts the two-step wizard that sets every product on that shelf to zero. |
| Submit | Any form | Saves. This is the point of no return. |
| Cancel / ✕ | Any form | Closes without saving. Safe to use at any time. |
| What you see | What it means |
|---|---|
| Green button | Safe, read-only action — usually a download. |
| Blue button | The normal way forward: open a menu, apply filters, submit a form. |
| Orange button | Changes stock. Think before clicking. |
| Red button | Destructive and permanent. Empty Location is the only one here. |
| Green tick in Is Selling | This stock is available for sale. |
| Red cross in Is Selling | Held back — not offered to customers. |
| Green +5 in Stock History | Stock went up by 5. |
| Red −5 in Stock History | Stock went down by 5. |
| Red asterisk * beside a field name | You must fill this in. |
| Number beside the funnel icon | How many filters are switched on. |
| Green message, top right | Success — your change was saved. |
| Red message, top right | Refused — nothing was saved. Read it and try again. |